sidenote

Archívum
A(z) „gizmó” kategória bejegyzései

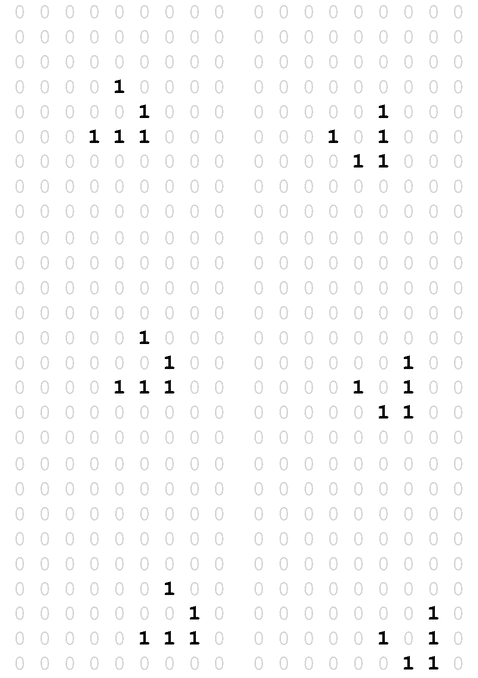
The other day I thought about that it would be nice to program Conway’s Game of Life in LaTeX and create an animated PDF output. You could say that implementing the Game of Life is pretty easy. It is. But not in LaTeX, at least not for me. After using LaTeX for years I still find it hard to understand some codes and especially writing programs in “pure LaTeX”.

Since I use PGF/TikZ fairly often I decided to use pgfmath for the implementation. Pretty soon I got stuck, I needed to assign values to array elements, and I didn’t know how to overcome this problem in LaTeX. So I decided to ask a question on TeX.SX. This is the point that things get interesting.

I asked a question with the title “Assign value to array element (PGF/TikZ)”, I also wrote that my aim was to program Conway’s Game of Life in LaTeX, and posted my initial code. Before long two answers came, and the question was renamed to “Programming Conway’s Game of Life in LaTeX”. The first answer implemented the Game of Life in LaTeX, the second implemented it in LuaTeX. I was stunned. Especially from the LaTeX implementation. I didn’t – and still don’t – understand the code. :) At the end I decided I should get acquainted with LuaTeX, and write my own solution in it:
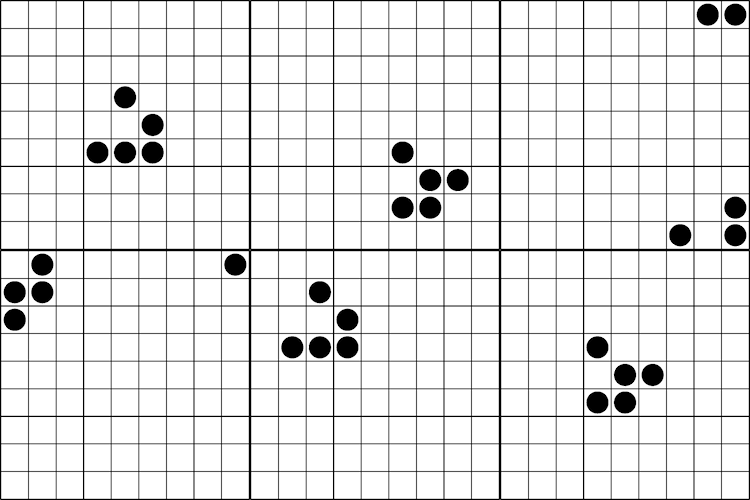
Glider

1
2
3
4
5
6
7
8
9
10
11
12
13
14
15
16
17
18
19
20
21
22
23
24
25
26
27
28
29
30
31
32
33
34
35
36
37
38
39
40
41
42
43
44
45
46
47
48
49
50
51
52
53
54
55
56
57
58
59
60
61
62
63
64
65
66
67
68
69
70
71
72
73
74
75
76
77
78
79
80
81
82
83
84
85
86
87
88
89
90
91
92
93
94
95
96
97
98
99
100
101
102
103
104
105
106
107
108
109
110
111
112
113
114
115
116
117
118
119
120
121
122
123
124
125
126
127
128
129
130
131
132
133
134
135
136
137
138
139
140
141
142
143
144
145
146
147
148
149
150
151
152
153
154
155
156
157
158
159
160
\documentclass{article}
\usepackage[a0paper]{geometry}

\usepackage{luacode}
\usepackage{animate}
\usepackage{tikz}
\usepackage{xcolor}
\usepackage[active, tightpage]{preview}
\PreviewEnvironment{animateinline
}
%\PreviewEnvironment{tikzpicture}

\tikzset{%
    cellframe/.style={%
        minimum size=5mm,%
        draw,%
        fill=white,%
        fill opacity=0%
    }%
}

\tikzset{%
    alivecell/.style={%
        circle,%
        inner sep=0pt,%
        minimum size=4mm,%
        fill=black%
    }%
}

\setlength{\PreviewBorder}{5mm}

\begin{document}

\begin{luacode*}
    iterations = 36
   
    grid = {{0, 0, 0, 0, 0, 0, 0, 0, 0},
        {0, 0, 0, 0, 0, 0, 0, 0, 0},
        {0, 0, 0, 0, 0, 0, 0, 0, 0},
        {0, 0, 0, 0, 1, 0, 0, 0, 0},
        {0, 0, 0, 0, 0, 1, 0, 0, 0},
        {0, 0, 0, 1, 1, 1, 0, 0, 0},
        {0, 0, 0, 0, 0, 0, 0, 0, 0},
        {0, 0, 0, 0, 0, 0, 0, 0, 0},
        {0, 0, 0, 0, 0, 0, 0, 0, 0}}
\end{luacode*}

\begin{luacode*}
    function evolve(grid)
        local temp = {}
        local gridsize = #grid
       
        for i = 1, gridsize do
            temp[i] = {}
            for j = 1, gridsize do
                temp[i][j] = 0
            end
        end
       
        for i = 1, gridsize do
            for j = 1, gridsize do
               
                iminus = i - 1
                iplus = i + 1
                jminus = j - 1
                jplus = j + 1
               
                if iminus == 0 then
                    iminus = gridsize
                end
               
                if iplus == gridsize + 1 then
                    iplus = 1
                end
               
                if jminus == 0 then
                    jminus = gridsize
                end
               
                if jplus == gridsize + 1 then
                    jplus = 1
                end
               
                neighbourcount = grid[iminus][jminus] +
                    grid[iminus][j] +
                    grid[iminus][jplus] +
                    grid[i][jminus] +
                    grid[i][jplus] +
                    grid[iplus][jminus] +
                    grid[iplus][j] +
                    grid[iplus][jplus]
               
                if (grid[i][j] == 1 and (neighbourcount == 2 or neighbourcount == 3)) or (grid[i][j] == 0 and neighbourcount == 3) then
                    temp[i][j] = 1
                else
                    temp[i][j] = 0
                end
            end
        end
       
        return temp
    end
   
    function display(grid)
        local gridsize = #grid
       
       
        for i = 1, gridsize do
            for j = 1, gridsize do
                tex.sprint([[\node[cellframe] at (]])
                tex.sprint((i - 1) * 5)
                tex.sprint([[mm,]])
                tex.sprint(-((j - 1) * 5))
                tex.sprint([[mm){0};]])
               
                if grid[j][i] == 1 then
                    tex.sprint([[\node[alivecell] at (]])
                    tex.sprint((i - 1) * 5)
                    tex.sprint([[mm,]])
                    tex.sprint(-((j - 1) * 5))
                    tex.sprint([[mm){1};]])
                end
            end
        end
    end
   
    function animate(grid, iterations)
        for i = 1, iterations - 1 do
            display(grid)
            tex.sprint([[\newframe]])
            grid = evolve(grid)
        end
        display(grid)
    end
   
    function frames(grid, iterations)
        for i = 1, iterations - 1 do
            tex.sprint([[\begin{tikzpicture}]])
           
            display(grid)
            grid = evolve(grid)
           
            tex.sprint([[\end{tikzpicture}]])
            tex.sprint([[\clearpage]])
        end
       
        tex.sprint([[\begin{tikzpicture}]])
        display(grid)
        tex.sprint([[\end{tikzpicture}]])
    end
\end{luacode*}

\noindent\begin{animateinline}[autoplay,loop,
begin={\begin{tikzpicture}[scale=1
]},
end={\end{tikzpicture}}]{5}
    \luadirect{animate(grid, iterations)}
\end{animateinline
}
%\noindent\luadirect{frames(grid, iterations)}

\end{document}

Note: More information about my implementation is available in my answer on TeX.SX.

It turned out to be pretty easy to do this in LuaTeX, however I struggled with the modulus operator (%) and printing from Lua to TeX. Still it became a pretty nice solution, I think.

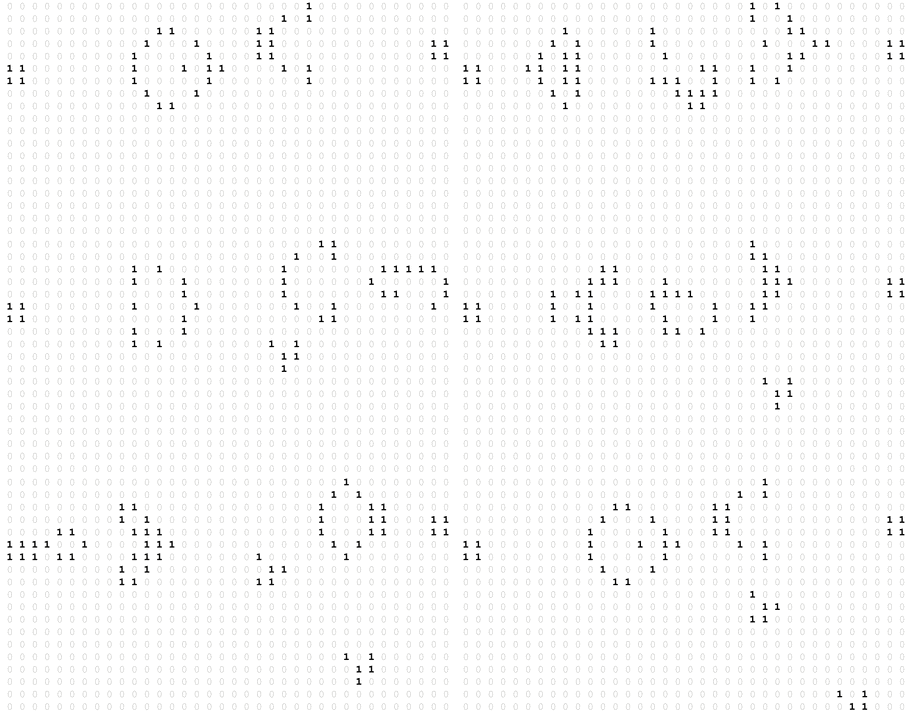
Last but not least I’m very grateful for the answers on my question. Here are some nice outputs of jfbu’s and JLDiaz’s answers (if you have a TeX.SX registration then please post an upvote on them because they are really great):
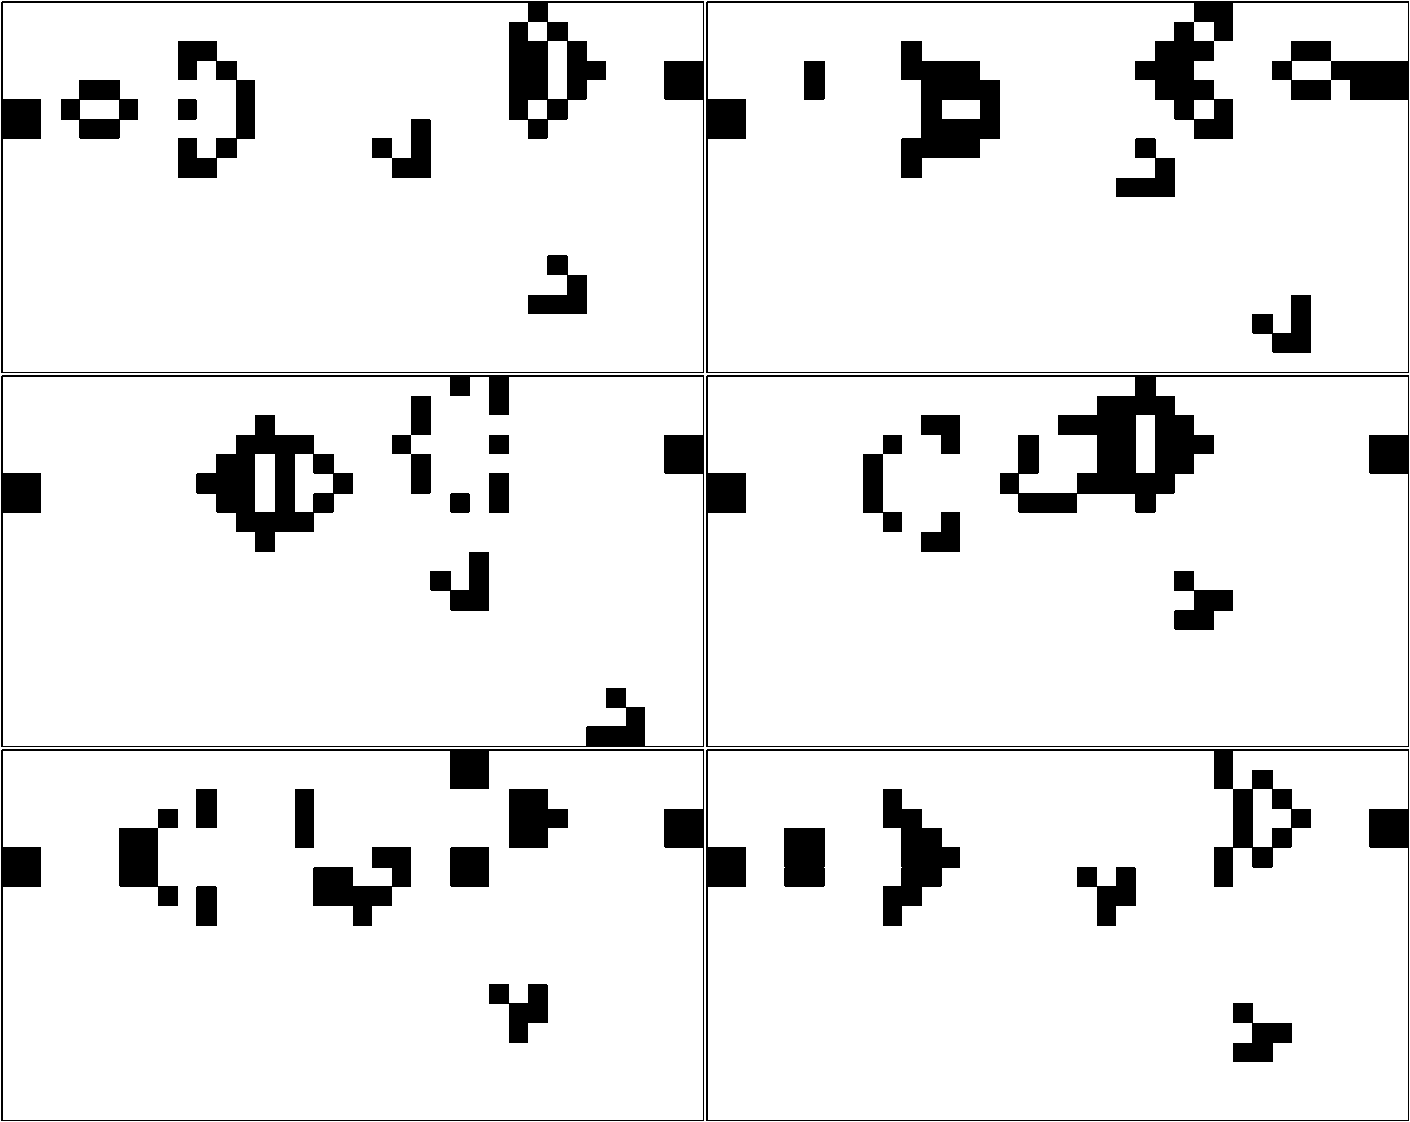
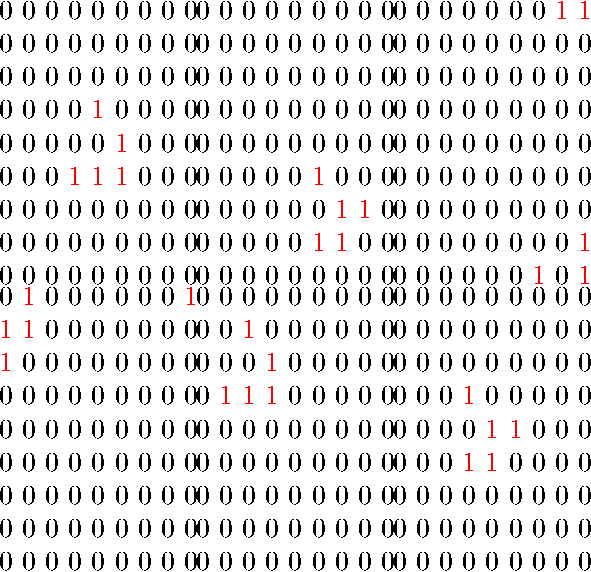
Gosper glider gun
Glider Glider
Gosper glider gun

A kedvenc Tumblr-em (tumblr.-em?, tumblr-em?, tumblim?) a text-mode:

A collection of text graphics and related works, stretching back thousands of years. Textiles, BBS-graphics, poetry, mosaic, typography, and much more. Collected by Raquel Meyers and Goto80.

Includes formats such as shift-JIS, PETSCII, ASCII, ANSI, RTTY, ATASCII, unicode, braille, xbin

Made for media like videotex, teletext, BBS, buildings, typewriters, clothes, textile, letterpress, toys, telidon, antiope, print, minitel

With styles such as animation, typography, mosaic, poetry, text art, χχχ, text mode, advertising, elite, kufic, sloyd

Putting the emphasis on grids, patterns, emoticons, tiles, tessellations

From ancient times and the 1700s, 1800s, 1900s, 1910s, 1920s, 1930s, 1940s, 1950s, 1960s, 1970s, 1980s, 1990s , 2000s, 2010s

Ezen a héten pedig virus week lesz náluk, ami nem tudom, mi, de val’szeg most jönnek majd a legjobb grafikák ever.

ʌ i ᴚ ∩ ʃ w ǝ Ǝ K ! ! ! ! ! @ text-mode

Forrás: text-mode

About a month and a half ago I planned to build a Raspberry Pi controlled car. The idea was to control it through WiFi with live video feedback. Unfortunately the car won’t be built due to lack of money and time, etc.

However I gathered a little experience during this “project”, so I’m sharing it through a guide on how to put together all the necessary hardware and software parts together. First, though, here are the main weaknesses of my setup:

  • The live video feed takes about 30–50% the Pi’s CPU, depens on motion.
  • High lag (up to 2 seconds).
  • Jittery software PWM.

In sum, this guide shows how to control a DC and a servo motor with live video feedback, but the end result will be slow and imprecise.

Hardware

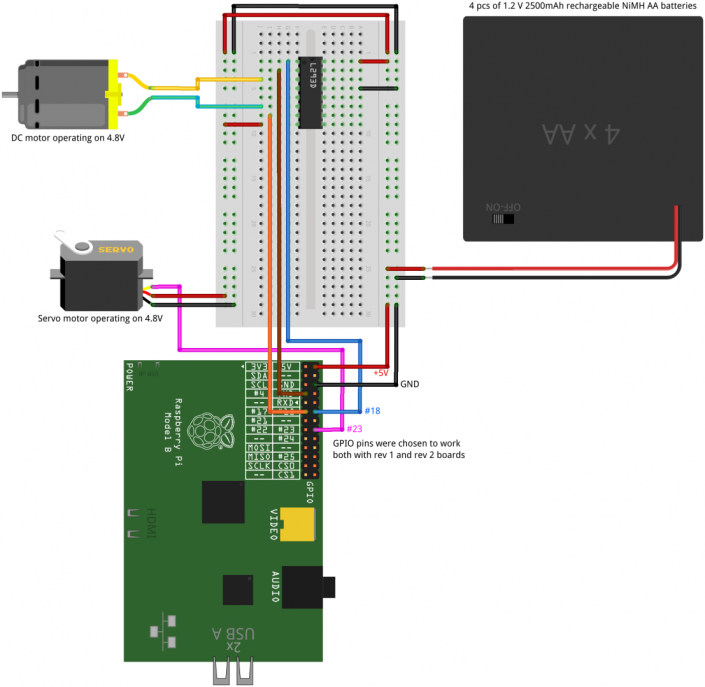
I planned to use two motors for the car, a DC motor for driving and a servo motor for steering. I followed The Adafruit Learning System’s guides for controlling a DC and a servo motors using the Raspberry Pi, so I won’t go into the details of the hardware setup and PWM signaling.

I combined the circuit diagrams of the two guides into one using Fritzing. You can download the Fritzing format of the diagram, it’s included in the downloadable tarball (doc directory) towards the end of the post.

Circuit diagram

Software

The idea was to control the car through a simple webpage with embedded live video. This had set the course which led me to use the following software setup.

Architectural diagram

Note: As for the OS I stayed with Raspbian, and since I didn’t have a camera board I used a webcam.

Necessary packages

First let’s install the necessary packages.

$ sudo apt-get install subversion libjpeg8-dev imagemagick python-rpi.gpio lighttpd

Subversion will be needed to checkout MJPG-Streamer’s source from SourceForge, while ImageMagick and libjpeg8-dev are needed for building MJPG-Streamer. RPi.GPIO is a Python package which we’ll use to control the GPIO pins, and lighttpd will serve the web page to the client.

MJPG-Streamer

Now we’ll checkout MJPG-Streamer’s source from SourceForge, enter the proper directory, modify the Makefile, and build MJPG-Streamer.

$ svn co https://mjpg-streamer.svn.sourceforge.net/svnroot/mjpg-streamer mjpg-streamer
$ cd mjpg-streamer/mjpg-streamer
$ sed -i 's/$(CC) $(CFLAGS) $(LFLAGS) $(OBJECTS) -o $(APP_BINARY)/$(CC) $(CFLAGS) $(OBJECTS) $(LFLAGS) -o $(APP_BINARY)/g' Makefile
$ make

If MJPG-Streamer was built successfully, edit your /etc/rc.local file.

$ sudo nano /etc/rc.local

Add the following lines right before the exit 0 statement. This command will launch MJPG-Streamer at system startup.

1
2
3
4
5
6
# Start MJPG-Streamer on multiuser runlevels
/home/pi/mjpg-streamer/mjpg-streamer/mjpg_streamer \
-i "/home/pi/mjpg-streamer/mjpg-streamer/input_uvc.so \
-f 30 \
-r 640x480"
\
-o "/home/pi/mjpg-streamer/mjpg-streamer/output_http.so"

Lighttpd

Edit lighttpd’s config file.

$ sudo nano /etc/lighttpd/lighttpd.conf

Make sure that lighttpd’s document root is the /var/www directory.

server.document-root        = "/var/www"

Add the following lines to the end of the file. These will load the CGI module, create an error log at /var/log/lighttpd/breakage.log, run Python scripts with a “custom” binary, and map the /usr/lib/cgi-bin/ directory to the document root as cgi-bin/.

server.modules             += ( "mod_cgi" )
server.breakagelog          = "/var/log/lighttpd/breakage.log"
cgi.assign                  = ( ".py" => "/usr/bin/python-root" )
alias.url                   = ( "/cgi-bin/" => "/usr/lib/cgi-bin/" )

Make lighttpd start on system startup, and restart lighttpd to use the updated configuration.

$ sudo update-rc.d lighttpd defaults
$ sudo service lighttpd restart

Nasty Python hack

I was using RPi.GPIO version 0.5.3a for controlling the GPIO pins and at the moment RPi.GPIO needs root permission to do this. So I needed to run the Python scripts as root, but since lighttpd can not be run as root – which would be a sechole – I needed to hack a little bit.

I found the solution in Dav’s Raspberry Pi – Controlling GPIO from the Web post: I made a copy of Python’s executable and gave it the setuid attribute.

$ sudo cp /usr/bin/python2.7 /usr/bin/python-root
$ sudo chmod u+s /usr/bin/python-root

Note: All Python scripts executed by lighttpd will now run as root. DO NOT USE THIS ON ANY PUBLIC SERVER AS THIS IS “A POTENTIALLY DANGEROUS TECHNIQUE”.

Control scripts

You can download the GPIO control scripts and the client web site by either clicking the link below or typing the following command.

$ wget http://sidenote.hu/wp-content/uploads/2013/07/motorcontrol.tar.gz

Now all we have to do is to extract the archive, copy all the files to the proper places, and add some permissions.

$ tar -xvzf motorcontrol.tar.gz
$ cd motorcontrol
$ sudo cp cgi-bin/* /usr/lib/cgi-bin/
$ sudo chmod +x /usr/lib/cgi-bin/*.py
$ sudo cp -R www/* /var/www/

The code in the archive is mostly uncommented especially the JavaScript part, but it’s not complicated.

The client side uses jQuery, so you’ll have to download jQuery 2.0.2 minified and copy it to /var/www/js/, or use the following command.

$ sudo wget http://code.jquery.com/jquery-2.0.2.min.js -O /var/www/js/jquery-2.0.2.min.js

The final step is to download a HTML5 CSS reset and place it in /var/www with the name reset.css.

$ sudo wget http://reset5.googlecode.com/hg/reset.css -O /var/www/reset.css

Using the software

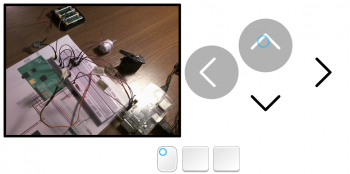
If everything was setup correctly then all you have to do is to enter your Pi’s IP in your browser’s address bar, and you should see the webpage with the controls and the live video.

Controlling motors with mouse Controlling motors with keyboard

You can either use the mouse or the keyboard to control the motors. If you use the mouse, then you can turn the servo by clicking on the left or right arrows (this will toggle the direction), and drive motor by holding down left click on the forwards or backwards arrow. When you use the keyboard you have to keep the arrow keys pressed to turn or drive the motors.

Crazyflie

https://www.youtube.com/watch?v=4VEPgyrsHGM

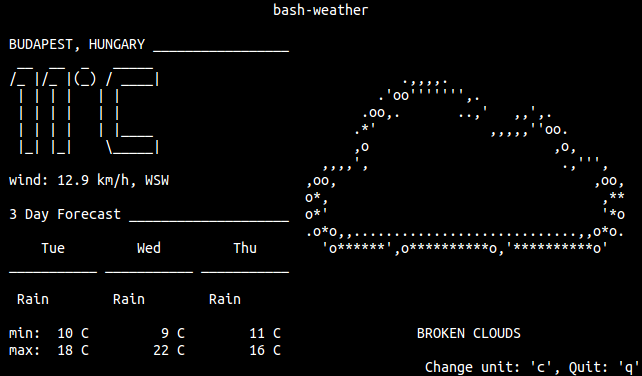
Csak röviden, tömören: elkészült a múltkor beharangozott bash-weather.

bash-weather

Megtalálható a bash.sidenote.hu-n, de elsődlegesen a GitHub-on.

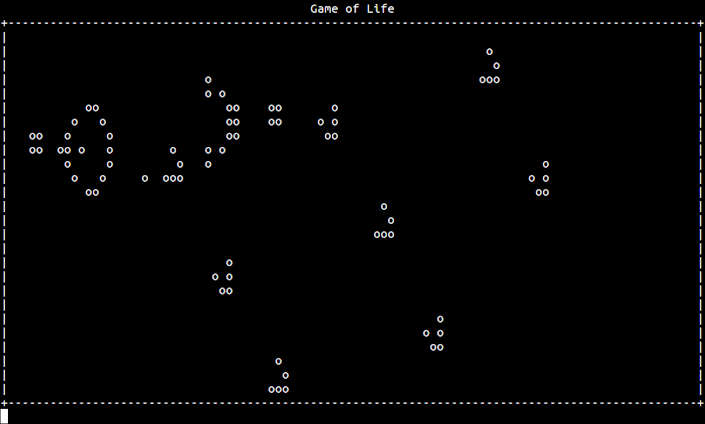
A bash-gorillas után itt a „legújabb” shell scriptem, a bash-life. Igazából tavaly nyáron írtam, de csak most tettem rendbe a kódot.

Így néz ki, természetesen karakteres képernyőn:

                                   bash-life                                    
+------------------------------------------------------------------------------+
|                                                                              |
|                                                                              |
|                                                                              |
|                                                                              |
|                                                                              |
|                        o                                                     |
|                         o                                                    |
|                       ooo                                                    |
|                                                                              |
|                                                                              |
|                                                                              |
|                                                                              |
|                                                                              |
|                                                                              |
|                                                                              |
|                                                                              |
|                                                                              |
|                                                                              |
|                                                                              |
|                                                                              |
+------------------------------------------------------------------------------+
Navigate: arrow keys, Toggle cell: spacebar                Start: 's', Quit: 'q'

A bash-life egy Bash-ben írt Game of Life szimulátor. Hogy mi az a Game of Life, a Wikipédiáról megtudható:

Az életjátékot (angolul: The Game of Life) John Conway, a Cambridge Egyetem matematikusa találta ki. Játékként való megnevezése megtévesztő lehet, mivel „nullszemélyes” játék; és a „játékos” szerepe mindössze annyi, hogy megad egy kezdőalakzatot, és azután csak figyeli az eredményt. Matematikai szempontból az ún. sejtautomaták közé tartozik. A játék egyes lépéseinek eredményét számítógép számítja ki […]

A négyzetrács mezőit celláknak, a korongokat sejteknek nevezzük. Egy cella környezete a hozzá legközelebb eső 8 mező (tehát a cellához képest „átlósan” elhelyezkedő cellákat is figyelembe vesszük, feltesszük hogy a négyzetrácsnak nincs széle). Egy sejt/cella szomszédjai a környezetében lévő sejtek. A játék körökre osztott, a kezdő állapotban tetszőleges számú (egy vagy több) cellába sejteket helyezünk. Ezt követően a játékosnak nincs beleszólása a játékmenetbe. Egy sejttel (cellával) egy körben a következő három dolog történhet:

  • A sejt túléli a kört, ha két vagy három szomszédja van.
  • A sejt elpusztul, ha kettőnél kevesebb (elszigetelődés), vagy háromnál több (túlnépesedés) szomszédja van.
  • Új sejt születik minden olyan cellában, melynek környezetében pontosan három sejt található.

Szóval, ezen szabályok alapján működik a bash-life is. A játék indítása után a négyzetrácson a nyíl gombokkal lehet navigálni, space-szel lehet egy sejtet életre kelteni/kinyírni, az „s” billentyűvel indítható a szimuláció, „q”-val pedig bármikor ki lehet lépni.

Előkövetelmény Bash ≥ 4.2, ncurses-bin és minimum 80×6 méretű terminál (ez utóbbi még változhat). A kód elérhető GitHub-on, a futtatáshoz pedig a következőket kell terminálba bepötyögni:

$ git clone https://github.com/szantaii/bash-life.git
$ cd bash-life
$ bash bash-life.sh

További fejlesztések:

  • a kód további kommentelése;
  • bejegyzés létrehozása a bash.sidenote.hu oldalon.

Bugreportot küldhettek mailen, akár diffet is, de jöhetnek a pull request-ek is GitHub-on.

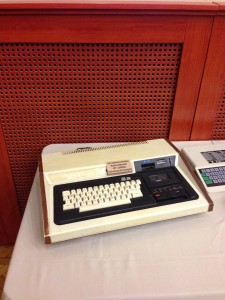
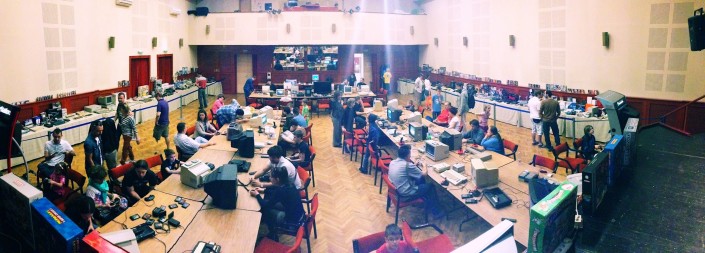
5. Retro video- és kvarcjáték kiállítás

Inkább képes beszámoló lesz ez, mintsem leírnám mi volt. Annyit mégis, hogy jó volt látni, ahogy a kisgyerekek élvezettel tolták a Wizard of Wor-t, a Super Mario-t, vagy a Pong-ot.

Kvarcjátékok

Orosz csodák Kvarcjátékok Mortal Kombat kvarcjáték
Kinyitható Nintendo megoldás Kétjátékos Nintendo cucc kontrollerrel Super Mario karóra – kéne!

Néhány régi gép

ZX gépek További ZX csodák Commodore
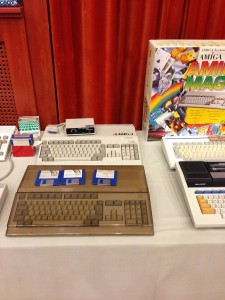
Amiga Híradástechnika Szövetkezet HT1080Z Iskolaszámítógép Magyar Pong!

5. Retro video- és kvarcjáték kiállítás

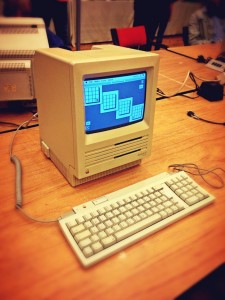
Apple

Newton Macintosh SE Macintosh PowerBook Duo 2300c

A képekért köszönet Rednek.

Ezt írtam legutóbb:

A következő nagy projekt a Gorillas játék Bash változata. Hosszú lesz megírni, és egészen biztos vagyok benne, hogy fájdalmasan lassan fog futni, de akkor is… Jó lesz!

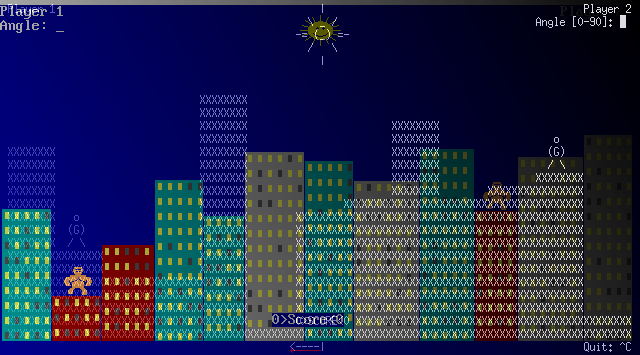
Nem volt hosszú, vagy nehéz megírni, és nem fut „fájdalmasan lassan” sem (ez persze géptől függ), viszont tényleg jó lett.

bash-gorillas

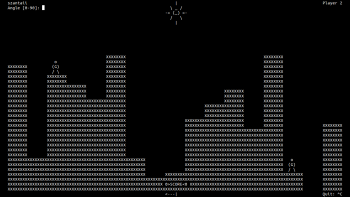
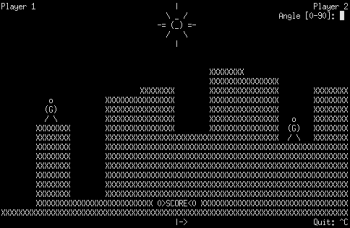
Előkövetelmény Bash ≥ 4.2, ncurses-bin, bc és minimum 80×22 méretű terminál. A kód elérhető GitHub-on, a futtatáshoz pedig a következőket kell terminálba bepötyögni:

$ git clone https://github.com/szantaii/bash-gorillas.git
$ cd bash-gorillas
$ bash bash-gorillas.sh

bash-gorillas bash-gorillas

További fejlesztések:

  • README frissítése (hét második fele);
  • kód kommentezése (majd valamikor);
  • dobás szög és sebesség felhasználó által való javítási lehetősége (ezt a hét második felében megcsinálom);
  • max_speed, wind_value beállítása a játék indításakor getopts használatával (hétvégén vagy jövő héten megírom);
  • bejegyzés létrehozása a Projektek, illetve a bash.sidenote.hu oldalakon.

A hátralevő fejlesztések ellenére már használható a cucc. Viszont ne habozzatok írni, ha találtok bugot, elérhetőségem a Rólunk oldalon. (Diffeknek örülnék a legjobban.)

#!/bin/bash

Az utóbbi időben mindenféléket írogatok, Bash-ben. Hogy miért shell script? Egyszerűen azt is mondhatnám, miért ne, de igazából arról van szó, hogy élvezem ennek a nyelvnek a használatát. Adatstruktúrából nincs sok, van tömb, asszociatív tömb és kb. ennyi, nincs objektum, nincs beépített lebegőpontos aritmetika. :) Igazi kihívás valami bonyolultabb problémát shell scriptben megírni, mégis előfordul, hogy a megoldás egész hatékony.

Ismét felmerül a kérdés, hogy miért próbálok bonyolult dolgokat shell scriptben megcsinálni, mikor azokra vannak más, bejáratott programozási nyelvek, metódusok. Egyszerűen azért mert szívás. Folyton workaroundokban kell gondolkodni, különböző trükköket kell bevetni, gondolkodtat, és szeretem feszegetni a határokat. Emellett ott van még a teljes userland, amit aztán úgy használok, ahogy csak akarok. A megoldás természetesen nem a leggyorsabb, néha fájdalmasan is lassú lehet, viszont shell scripteket könnyedén és gyorsan lehet írni.

Létrehoztam egy oldalt, ahol közzétettem néhány scriptemet: http://bash.sidenote.hu/

Eddig a következőket tettem fel:

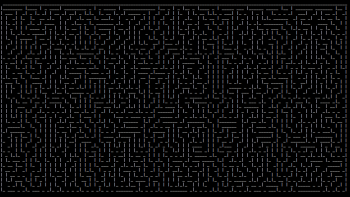
  • ASCII labirintus generátor,
  • Debian font csomag preview script,
  • logaritmikus spirál kirajzoló script,
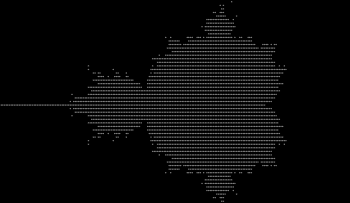
  • Mandelbrot halmaz kirajzoló script.

ASCII maze Debian fontpackage previewer
Logarithmic spiral Mandelbrot set

Minden script GNU GPL v3-as licenccel van ellátva. Hogy a licenc mit enged és mit nem, megtaláljátok a shell script oldalon. További scriptek várhatók, pl. amint lesz időm szépen bekommentezem, és kiteszem a Bash-ben írt Game of Life szimulátoromat, mely az alábbi képre kattintva működés közben is megtekinthető. VIGYÁZAT, MÁSFÉL MEGÁS ANIMGIF!

Game of Life Shell Script

A következő nagy projekt a Gorillas játék Bash változata. Hosszú lesz megírni, és egészen biztos vagyok benne, hogy fájdalmasan lassan fog futni, de akkor is… Jó lesz!

BashGorillas

Pont azután olvastam Plastik Józsi angelday Commodore 64 BASIC „grafikás” posztját, hogy nekiálltam, és meghegesztettem a Gorillas-t, hogy fusson Windowson és Linuxon. Tökéletes időzítés.

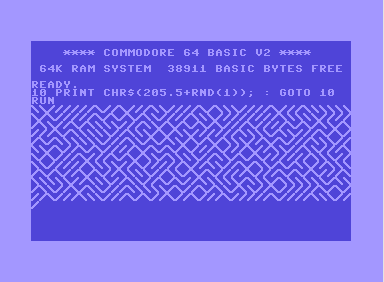
Ezzel az egy sorból kiindulva készült egy könyv, ami a számítógépek és a procedurális BASIC grafikák világát, benne a Commodore 64-et mutatja be – 10print.org. […]

Plastik média – 10 PRINT CHR$(205.5+RND(1)); : GOTO 10

Nagyon jó könyv, gyönyörű dolgok vannak benne.

10 PRINT CHR$(205.5+RND(1)); : GOTO 10

Gondoltam egyet, és átírtam a 10 PRINT CHR$(205.5+RND(1)); : GOTO 10 sort Batch-be, PowerShellbe és Bash-be is. Sajnos az első három változat nem produkál olyan szép „képet”, mint C64-en, viszont ha kicseréljük a „/” (slash) és „\” (backslash) karaktereket „-” és „|” (vertical bar) karakterekre, akkor egész szép labirintusokat kapunk. Linux-on Unicode terminált használva szinte tökéletes az output.

  • Batch

    1
    2
    3
    4
    5
    6
    7
    8
    9
    :LOOP
        @ECHO OFF
        SET /A R=%RANDOM% %%2
        IF %R%%2==0 (
                ECHO|SET /P=/
            ) ELSE (
                ECHO|SET /P=\
            )
    GOTO LOOP
  • PowerShell

    1
    While($true) {Write-Host -NoNewline $(if ((Get-Random -Minimum 0 -Maximum 2) -eq 0){"/"} else {"\"})}
  • Bash (Mac)

    1
    while true ; do if [ $((RANDOM % 2)) -eq 0 ] ; then printf "/" ; else printf "\" ; fi done
  • Bash (Linux)

    1
    while true ; do printf "\u257$(($RANDOM % 2 + 1))"; done

Hála a fent említett könyvnek, ismét felfedeztem a Processinget. Remélem sikerül valami érdekeset szépet alkotnom vele.